Configuring External Storage (GUI)
The External Storage Support application enables you to mount external storage services and devices as secondary ownCloud storage devices. You may also allow users to mount their own external storage services.
All of these connect to a LAN ownCloud server that is not publicly accessible, with one exception: Google Drive requires an ownCloud server with a registered domain name that is accessible over the Internet.
Supported mounts
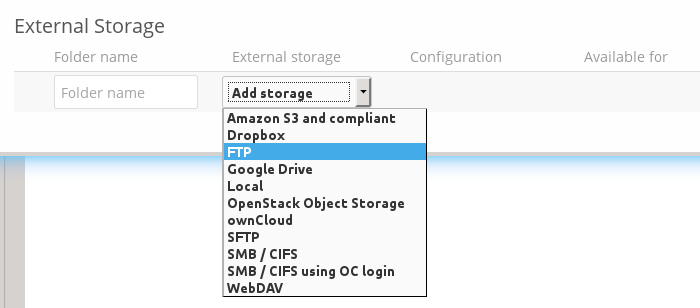
ownCloud admins may mount these external storage services and devices:
- Local
- Amazon S3 and S3 compliant
- Dropbox
- FTP/SFTP
- Google Drive
- OpenStack Object Storage
- SMB/CIFS
- SMB/CIFS using OC login
- ownCloud
- WebDAV
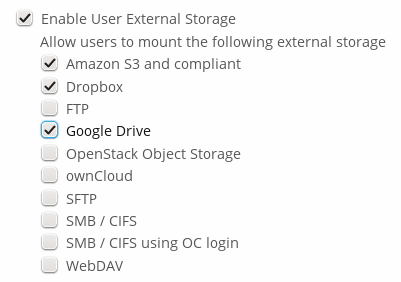
ownCloud users can be given permission to mount any of these, except local storage.
To understand how ownCloud manages passwords for external mounts, and the security implications, see the External Storage Password Management section of Configuring External Storage (Configuration File).
Note
A non-blocking or correctly configured SELinux setup is needed for these backends to work. Please refer to the SELinux Configuration.
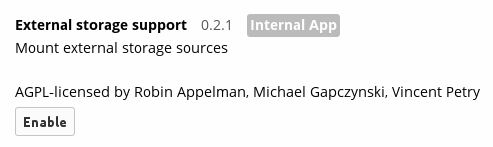
Enabling External Storage Support
The External storage support application is enabled on the Apps page.
After enabling it, go to your Admin page to set up your external storage mounts.
When your configuration is correct you’ll see a green light at the left, and if it isn’t you’ll see a red light.
Check Enable User External Storage to allow your users to mount their own external storage services, and check the services you want to allow.
After creating your external storage mounts, you can share them and control permissions just like any other ownCloud share.
Using self-signed certificates
When using self-signed certificates for external storage mounts the certificate needs to be imported in the personal settings of the user. Please refer to this blogpost for more informations.
Adding files to external storages
In general it is recommended to configure the background job Webcron or Cron as described in Defining Background Jobs so ownCloud is able to detect files added to your external storages without the need that a users is browsing your ownCloud installation.
Please also be aware that ownCloud might not always be able to find out what has been changed remotely (files changes without going through ownCloud), especially when it’s very deep in the folder hierarchy of the external storage.
You might need to setup a cron job that runs sudo -u www-data php occ files:scan --all (or replace “–all” with the user name, see also Using the occ Command) to trigger a rescan of the user’s files periodically (for example every 15 minutes), which includes the mounted external storage.
Local Storage
Use this to mount any directory on your ownCloud server that is outside of your ownCloud data/ directory. This directory must be readable and writable by your HTTP server user.
In the Folder name field enter the folder name that you want to appear on your ownCloud Files page.
In the Configuration field enter the full filepath of the directory you want to mount.
In the Available for field enter the users or groups who have permission to access the mount.

Amazon S3
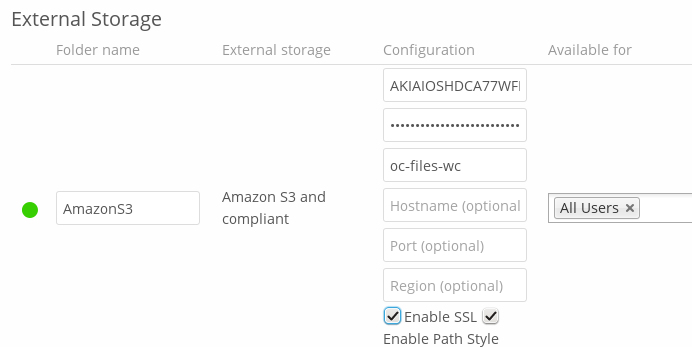
All you need to connect your Amazon S3 buckets to ownCloud is your S3 Access Key, Secret Key, and your bucket name.
In the Folder name field enter the folder name that you want to appear on your ownCloud Files page.
In the Access Key field enter your S3 Access Key.
In the Secret Key field enter your S3 Secret Key.
In the Bucket field enter the name of your S3 bucket you want to share.
In the Available for field enter the users or groups who have permission to access your S3 mount.
The hostname, port, and region of your S3 server are optional; you will need to use these for non-Amazon S3-compatible servers.
Dropbox
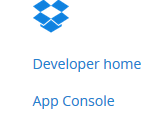
Connecting Dropbox is a little more work because you have to create a Dropbox app. Log into the Dropbox Developers page and click App Console:
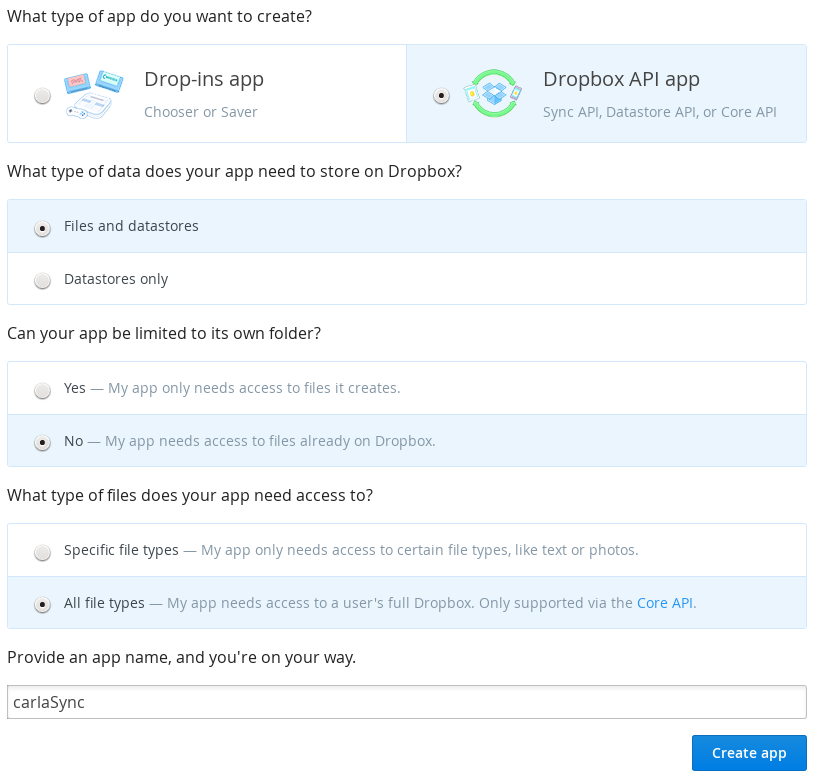
If you have not already created any Dropbox apps it will ask you to accept their terms and conditions. Then you are presented with the choice to create either a Drop-ins App or a Dropbox API App. Click Dropbox API App, and then check:
- Files and datastores.
- No – My app needs access to files already on Dropbox.
- All file types – My app needs access to a user’s full Dropbox. Only supported via the CoreAPI.
Then enter whatever name you want for your app.
Now click the Create App button. Under Status, do not click Development (Apply for production status) because that is for apps that you want to release publicly.
Click Enable additional users to allow multiple oC users to use your new Dropbox share.
Note your App key and App secret, which you will enter in the External Storage form on your ownCloud Admin page.
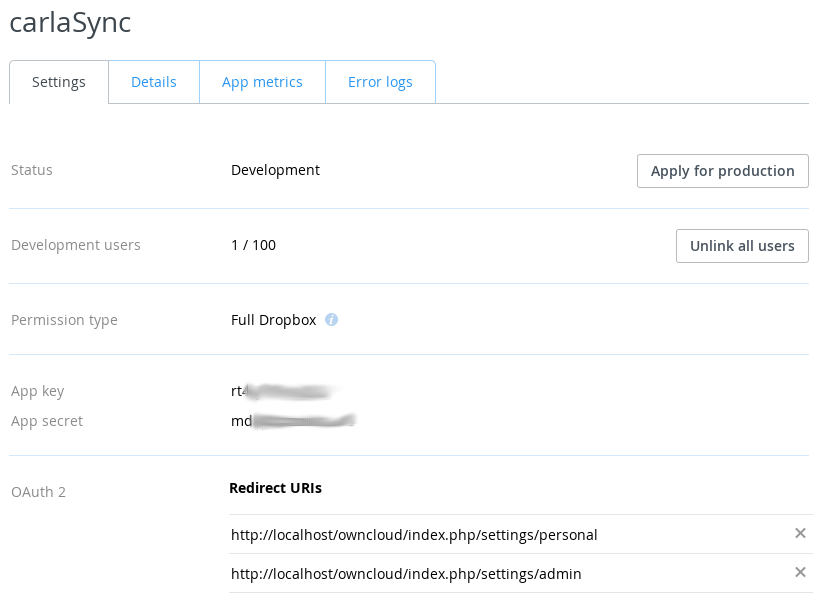
Your ownCloud configuration requires only the local mount name, the App Key and the App Secret, and which users or groups have access to the share.

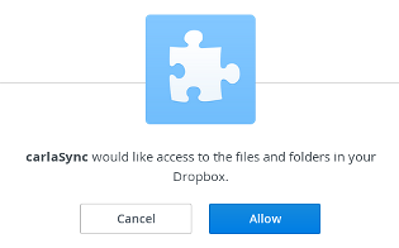
You must be logged into Dropbox, and when ownCloud successfully verifies your connection Dropbox will ask for verification to connect to your Dropbox account. Click Allow, and you’re done.
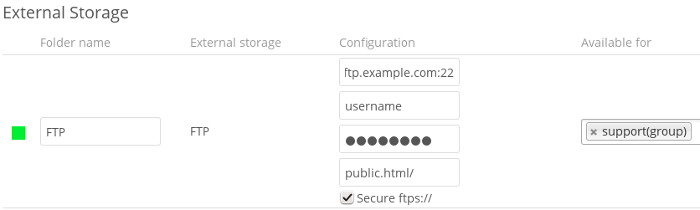
FTP/FTPS/SFTP
Connecting to an FTP server requires:
- Whatever name you want for your local mountpoint.
- The URL of your FTP server, and optionally the port number.
- FTP server username and password.
- The FTP directory to mount in ownCloud. ownCloud defaults to the root directory. When you specify a different directory you must leave off the leading slash. For example, if you want to connect your public_html/images directory, then type it exactly like that.
- Choose whether to connect in the clear with ftp://, or to encrypt your FTP session with SSL/TLS over ftps:// (Your FTP server must be configured to support ftps://)
- Enter the ownCloud users or groups who are allowed to access the share.
Note
The external storage FTP/FTPS/SFTP needs the allow_url_fopen PHP setting to be set to 1. When having connection problems make sure that it is not set to 0 in your php.ini.
SFTP uses SSH rather than SSL, as FTPS does, so your SFTP sessions are always safely tucked inside an SSH tunnel. To connect an SFTP server you need:
- Whatever name you want for your local mountpoint.
- The URL of your SFTP server.
- SFTP server username and password.
- The SFTP directory to mount in ownCloud.
- The ownCloud users or groups who are allowed to access the share.
Google Drive
All applications that access a Google API must be registered through the Google Cloud Console. Follow along carefully because the Google is a bit of a maze and it’s easy to get lost.
Note
Your ownCloud server must have a registered domain name and be accessible over the Internet; Google Drive will not connect to a LAN-only server.
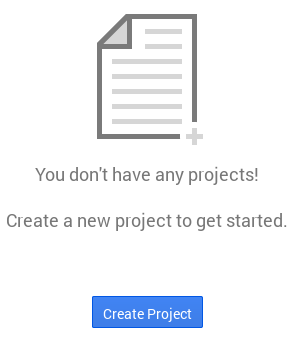
If you already have a Google account, such as Groups, Drive, or Mail, you can use your existing login to log into the Google Cloud Console. After logging in click Go to my console, and then click the Create Project button. It takes a minute or two to create your new project.
In the next screen give your project a name, accept the default Project ID or create your own, click the Terms of Service box, and click the Create button.

The next screen is your Project Dashboard. In the left sidebar click APIs & Auth > APIs, and then enable the Drive API and Drive SDK by toggling the boxes in the far-right Status column to the green On buttons.

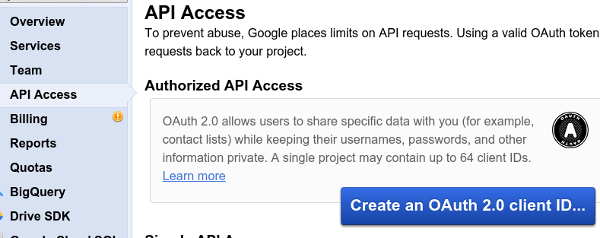
This brings you to the Google Drive SDK screen. Click API Access.

This opens the API Access screen. Click the Create a 0Auth 2.0 Client ID button.
The next screen that opens is Create Client ID: Branding Information. Google requires to you to fill this out. When you’re finished move on to the Create Client ID: Client ID Settings screen.
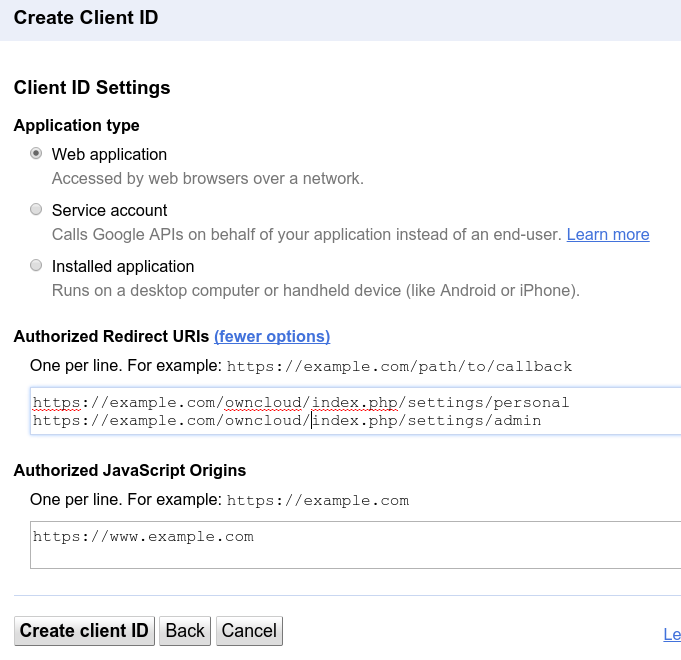
The Application Type is Web application.
Click Your site or hostname (more options) to expose Authorized Redirect URIs. Enter two Redirect URIs like these examples, replacing https://example.com/owncloud/ with your own ownCloud server URL. You must use a registered domain name, and you cannot use the server’s IP address.
Click Create client ID and you’ll see a screen like this:
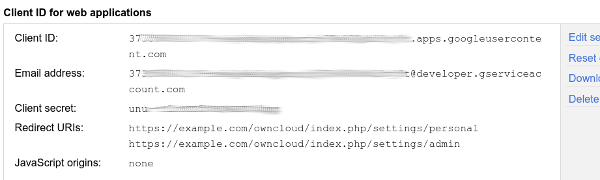
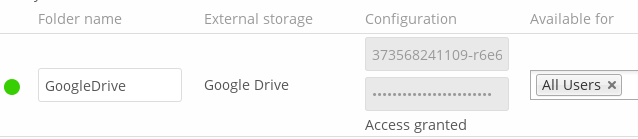
This contains your Client ID and Client Secret, which you need to set up your ownCloud connection. Go to your Admin page in ownCloud, create your new folder name, enter the Client ID and Client Secret, select your users and groups, and click Grant Access.
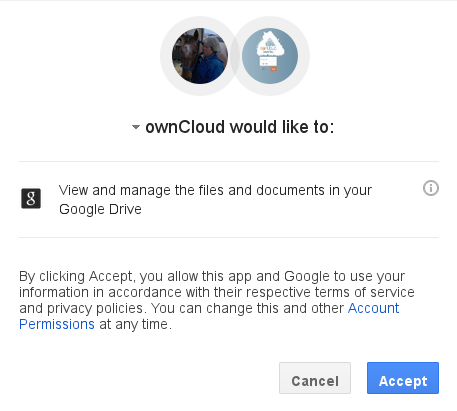
Google will open a dialogue asking for permission to connect to ownCloud. Click Accept and you’re finished.
SMB/CIFS
You can mount SMB/CIFS file shares on ownCloud servers that run on Linux. This only works on Linux ownCloud servers because you must have smbclient installed. SMB/CIFS file servers include any Windows file share, Samba servers on Linux and other Unix-type operating systems, and NAS appliances.
You need the following information:
- Folder name – Whatever name you want for your local mountpoint.
- Host – The URL of the Samba server.
- Username – The username or domain/username used to login to the Samba server.
- Password – The password to login to the Samba server.
- Share – The share on the Samba server to mount.
- Root – The folder inside the Samba share to mount (optional, defaults to ‘/’). To assign the ownCloud logon username automatically to the subfolder, use $user instead of a particular subfolder name.
And finally, the ownCloud users and groups who get access to the share.

SMB/CIFS using OC login
This works the same way as setting up a SMB/CIFS mount, except you can use your ownCloud logins intead of the SMB/CIFS server logins. To make this work, your ownCloud users need the same login and password as on the SMB/CIFS server.
Note
Shares set up with SMB/CIFS using OC login cannot be shared in ownCloud. If you need to share your SMB/CIFS mount, then use the SMB/CIFS mount without oC login.
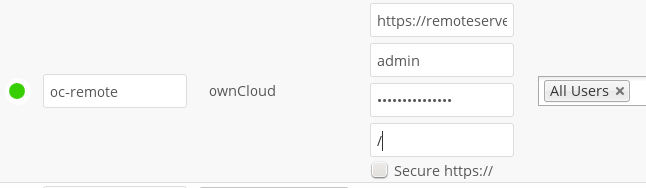
ownCloud and WebDAV
Use these to mount a directory from any WebDAV server, or another ownCloud server.
- Folder name – Whatever name you want for your local mountpoint.
- URL – The URL of the WebDAV or ownCloud server.
- Username and password for the remote server
- Root – The remote folder you want to mount (optional, defaults to /)
- Secure https:// - Whether to use https:// to connect to the WebDav server instead of http:// (We always recommend https:// for security)
OpenStack Object Storage
Use this to mount a container on an OpenStack Object Storage server. You need the following information:
- Username
- Bucket
- Region
- API Key
- Tenantname
- Password
- Service Name
- URL of identity Endpoint
- Timeout of HTTP request
Configuration File
The configuration of mounts created within the External Storage App are stored in the data/mount.json file. This file contains all settings in JSON (JavaScript Object Notation) format. Two different types of entries exist:
- Group mounts: Each entry configures a mount for each user in group.
- User mount: Each entry configures a mount for a single user or all users.
For each type, there is a JSON array with the user/group name as key and an array of configuration values as the value. Each entry consist of the class name of the storage backend and an array of backend specific options (described above) and will be replaced by the user login.
Although configuration may be done by making modifications to the mount.json file, it is recommended to use the Web-GUI in the administrator panel (as described in the above section) to add, remove, or modify mount options to prevent any problems. See Configuring External Storage (Configuration File) for configuration examples.